How to make melt and pour soap and never fear lye again! I think the number one thing that keeps people from making their own soap is the fear of working with lye; I get that. But you can make some wonderful, and much more natural soap with melt and pour soap bases; and never have to deal with lye. Now I know some of you awesome soap makers are going to say that melt and pour soaps are not really soap making but I think it is a great starting place. I got the soap making bug starting out with these simple bases and adding my own ingredients.
Maybe you’re not sure where to start with how to make melt and pour soap – then this is the post for you! Be sure to check out the 3 easy to make melt and pour recipes I’ve included too; print them out and let me know how they work for you!
How to Make Melt and Pour Soap
Melt and Pour Soap FAQ
Why Would Anyone Want to Make Melt and Pour Soap?
- It is quick and fairly easy to start.
- Working with lye often intimidates people.
- You can customize it very easily.
- It is a good introduction into soap making.
- No need to wait for curing – ready to use immediately.
- Great way to get children involved in soap making.
- Wonderful way to make Simple DIY Gifts that people love!
Are Melt and Pour Soap Ingredients Safe? 
- Yes! And often has much cleaner ingredients than you’d find in a commercial soap. You can add a lot of “stuff” that negates the cleaner version as far as ingredients; but that’s the great part – you are in control!
What Equipment Do I Need for Melt and Pour Soap Making?
You don’t need a lot to get started and you can get different molds depending on the look you want. But these are my recommendations for starting out:
Soap Mold – individual bars or a loaf style are the most common but you can get a variety of shapes too! I use the loaf style when I want a more artisan look to my soaps but make sure you have a cutter to make individual bars.
Soap Base – The type of soap base you use will be determined on the final look you want for your soap. I use a pure, organic, white goat milk soap base. This is good for just about any soap. But many like the clear base which can be fun to add little toys or decor that you want to be seen in the soap.
To melt your base you can use a double broiler on the stove-top or your microwave. You want to use bowls and equipment that you save for soap making and don’t need for cooking.
Colorants – There are a variety of ways to color your soaps, I like mica powders or all-natural colorants but others prefer liquid colorants. Colorants are absolutely optional, more about creating a visual appeal than anything else.
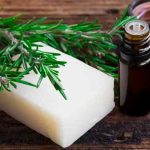
Fragrance – Again, purely optional as far as soap making. Fragrance can be added to melt and pour soaps via essential oils or soap specific fragrances. Make sure if you add any fragrance that it is made for skin. If you aren’t sure how much to put in I recommend checking out Brambleberry’s Fragrance Calculator.
Small Spray Bottle with Rubbing Alcohol (Like this)
Safety – While not as much as a concern, because you won’t be dealing directly with lye, you may want to consider safety google and gloves.
I hope that these 3 simple melt and pour soap recipes give you the confidence to try your hand at soap making!
How to Make Melt and Pour Soap – Recipes to Try
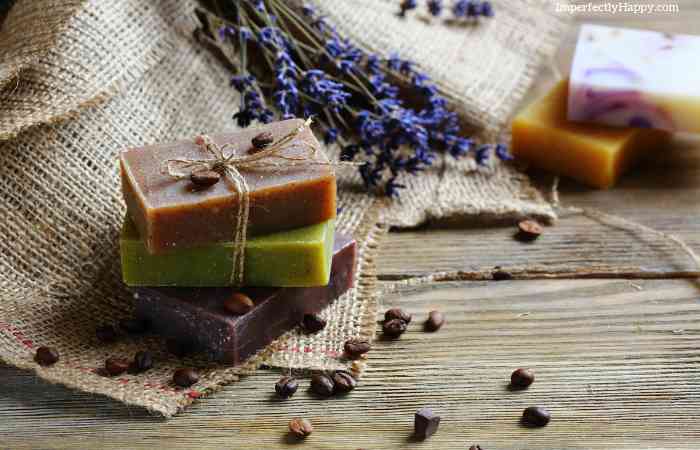
Melt and Pour Coffee Ground Soap
One of my favorite soaps, because I just love coffee. But it really is great for exfoliation!
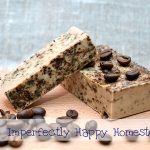
Easy Melt and Pour Coffee Ground Soap Recipe
Ingredients
- 1.5 lbs Organic Goat’s Milk Soap Base
- 1 Tablespoon of fresh ground coffee
- 1 Teaspoon of Almond Oil
- 1 – 1.5 Teaspoons of Fragrance optional (scents you many want to consider – vanilla, coffee cake or cinnamon)
Instructions
-
Get your double boiler ready
-
(I recommend you use a bowl or pan you’re going to use for food, this should be soap dedicated only)
-
Put your molds on a cookie sheet (cover with wax paper or the like, to protect from spills)
-
Cut your soap base into chunks
-
Gently melt the chunks in your double boiler on low to low medium – you don’t want to scald your base
-
Remove from heat and quickly mix in your coffee, almond oil and fragrance into the melted base (but be careful, it’s hot!)
-
Pour into molds, just short of the top
-
Spray, generously, with the rubbing alcohol to prevent air bubbles
-
Allow bars to harden for a few hours – you can put them in the refrigerator for an hour to speed this up.
-
Be sure to carefully test the soap before trying to remove them.
-
Once the bars or loaf is completely hardened pop them out and store in air-tight containers.
-
They are ready to use immediately, no curing time needed.
-
Package them up for gifts in brown wrapping and twine for a rustic feel, if you like.
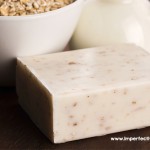
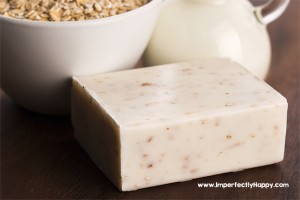
Creamy Milk and Honey Oatmeal Melt and Pour Soap
Ingredients
- 2 lbs of Goat’s Milk Soap Base
- 1/2 cup of Old Fashioned Oats not instant and preferably organic (run through food processor for finer grain)
- 5-6 teaspoons of fragrance oil optional
Instructions
-
Prepare your double boiler
-
(don’t use a bowl or pan you’re going to use for food, this should be soap dedicated only)
-
Put your molds on a cookie sheet (cover to protect from spills)
-
Cut the soap base into chunks
-
Slowly melt the chunks in your double boiler – you don’t want to scald your base
-
Remove from heat and quickly mix your oatmeal and fragrance oil into the melted base
-
You’re going to love the pleasant exfoliant the oatmeal offers in these bars
-
Pour into molds, nearly to the top
-
Spray, generously, with the rubbing alcohol to prevent air bubbles
-
Allow bars to harden for a few hours – if you’re in a hot climate you can pop them in the fridge for an hour to speed this up.
-
Once completely hardened pop them out of the molds and store in air-tight containers.
-
They are ready to use immediately, unlike hot or cold processed soaps the require curing for several weeks.
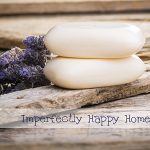
Goat's Milk and Lavender Melt and Pour Shampoo Bar
Ingredients
- 1 lbs Organic Goat’s Milk Glycerin Melt & Pour Soap Base
- 1 tsp Mango Butter
- 2 tsp Castor Oil
- 20 – 25 drops of high quality lavender essential oil
Instructions
-
Cut your soap base and melt on low heat (you don’t want it to burn or boil)
-
Once melted add in the Mango Butter and allow that to melt
-
Remove from heat and mix in the Castor Oil
-
Add in the optional Lavender Oil
-
Making sure mold is on a firm, level, surface – pour the mixture into your mold nearly level
-
Spay with the rubbing alcohol to prevent air bubbles
-
Let cool for several hours
-
Gently remove from the mold
-
Store in an air-tight container, they should be good for up to a year.
Recipe Notes
How to Use Your Goat's Milk and Lavender Melt and Pour Shampoo Bars: Just like shampooing with liquid, get your hair wet, then wet the bar as well. Take the bar and either create a lather in your hands or use it directly on your scalp and hair. Work the soap into a lather and then rinse.
When you’re ready to take the leap into homemade soap making check out How to Make Amazing Homemade Soap from Scratch!