Drying your own herbs is a time-honored tradition going back as far as gardening itself. There are several methods you can employ to keep the herbs potent in power and flavor. You don’t have to have fancy equipment to do it right! Herb drying isn’t difficult and can be a wonderful way to keep your garden bounty useful all year long.
Drying Your Own Herbs
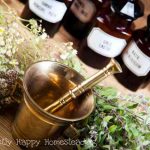
So you’re an herb gardener and now you’re ready to preserve your garden goodies for later use. Let’s talk about harvesting those beauties first. The best time to cut your herbs is in the morning, after any dew has dried. Harvest the healthiest parts and compost the sick or wilted. This will insure the best flavor when drying your own herbs. Now you’ll want to give them a rinse, removing any dirt or bugs. Just pat down or air dry before before starting any drying method.
Methods to Drying Your Own Herbs
Air-Dry
Air drying your own herbs is a truly classic way to go. The best part about this method – no special equipment needed! Great for low moisture herbs like dill, oregano, marjoram, and rosemary.
- Once you’ve harvested and prepared your herbs you’ll want to gather them into bunches 5 – 10 branches. You can tie these with string or rubber bands to hold them together.
- Hang them up inside in a warm, dry, space.
- Consider wrapping them in a paper lunch bag with a few holes cut into it.
- It can take several days for the herbs to completely dry.
Oven
- Pre-heat your oven to the lowest temp, mine goes down to 170 degrees Fahrenheit.
- Lay your herbs out in a single layer on a cookie sheet.
- Avoid overlapping them to allow for air circulation.
- Put the cookie sheets in the oven but DO NOT close the door all the way. Make sure to prop it open slightly to allow air to flow!
- Turn the oven off!
- Most herbs will try in 10 – 20 minutes using this method.
Solar Oven
This may be my favorite way to dehydrate herbs – I need to put this desert sun to work here in Phoenix! I use my All American Sun Oven for this job.
- Just like an oven you want to put your herbs on a sheet in a single layer. You can use racks with some parchment paper.
- You’ll also want to vent your solar oven for good air flow, just like the kitchen oven.
- Maintain a temp of 110 – 150 but be careful not to allow it to get overheated (challenge here in Phoenix).
- Should take less than a day to dry several racks
Check out the Sun Oven’s video on this!
Dehydrator
A dehydrator certainly can do the job, and with little effort. I have Nesco Snackmaster Pro Food Dehydrator![]() and it does a good job drying herbs without me watching it.
and it does a good job drying herbs without me watching it.
- Place single layer of herbs on a drying screen with room for the air to circulate.
- With small leaf herbs you may need to use 2 screens to keep the herbs from flying around; or use the fruit roll sheet.
- Follow the directions with your dehydrator for temp and time.
NOTE: Make sure that your herbs are dried completely and that you store them in an air-tight container to prevent mold. If they don’t crumble easily in your fingers then they may need more dry time.
So many choices – you might want to try them all. Whatever way you decide to go for drying your own herbs, you’ll be glad you did.
Other articles you might like:
How to Use Fresh Basil (Food Storage Moms)