This is my favorite Instant Pot Chili Recipe. I love that we can enjoy a warm bowl of homemade chili any night because the Instant Pot makes it a quick and easy meal. So you can even make the chili on a busy weeknight!
I have come to really rely on my Instant Pot. So much so that I have 2 in my home right now. I like having one for a main dish and one for making any sides. Some days I’m not sure how I got along without it. I still love my crock pot but the Instant Pot gives me great results in a fraction of the time!
I recently got the Ninja Foodi because it has a large capacity and will pressure cook, slow cook, air fry and more. So many options!
As always, there is a fully printable version of this recipe at the end of the post.
How Long Does it Take to Make Instant Pot Chili?
This chili recipe takes about 10 minutes for prep time and 30 minutes cooking time (15 minutes of pressure cooking and 15 minutes of natural release).
So it will be reading to eat in less than an hour! But you won’t sacrifice any flavor because pressure cooking gives it the taste of cooking all day long.
How to Serve Instant Pot Chili
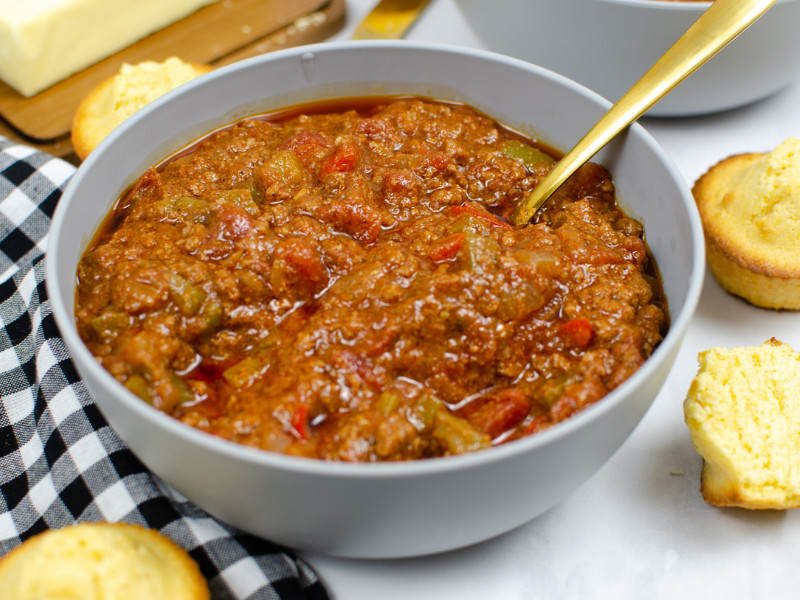
I like a bowl of this chili recipe topped with some shredded cheese, green onions and just a dollop of sour cream. I also will add in some hot sauce when I want more heat!
What’s a Good Side Dish for Chili?
I like to serve it with cornbread and a crispy green salad.
If you have more time for baking try it with my Pumpkin Ale Bread with Hatch Green Chiles!
Serving Variations for Chili
You can make and serve this chili traditionally or change it up a bit. Consider making chili nachos over corn tortillas with queso on top.
Or you could even serve it over a baked potato or rice to make the chili last longer or serve more people.
Must Have Ingredients for this Instant Pot Chili Recipe
- Ground beef (or substitute ground turkey, or ground chicken)
- Vegetable Oil
- Red Bell Pepper
- Green Bell Pepper
- White onion
- Diced Tomatoes (canned)
- Salt
- Black Pepper
- Chili Powder
- Ground Cumin
- Paprika
- Garlic Powder
- Cayenne Pepper
- Tablespoon of Maza Harina as needed to thicken
Equipment Needed for Instant Pot Chili
Steps to Making Instant Pot Chili Recipe
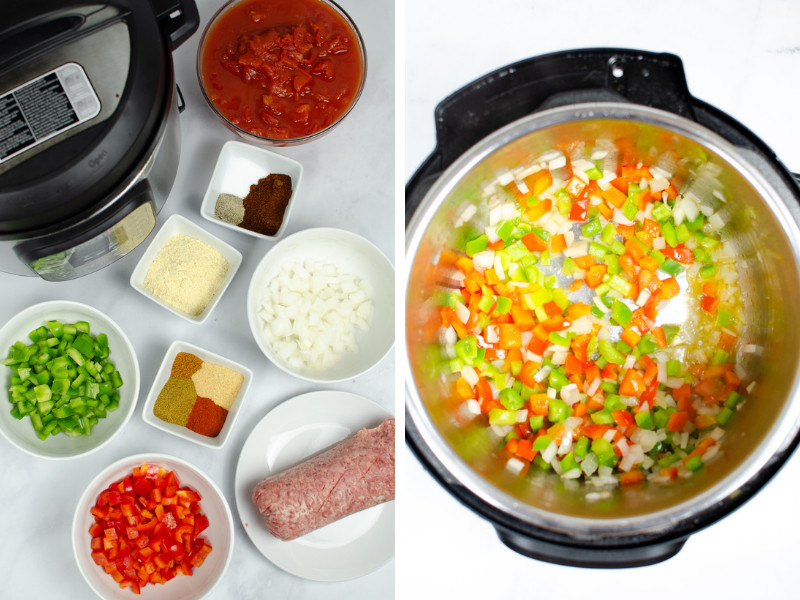
Set your instant pot to sauté mode. Add 2 tablespoons of vegetable oil.
Once your oil is hot, add your bell peppers, and onion. Sauté well to release the flavors until softened. About two minutes.
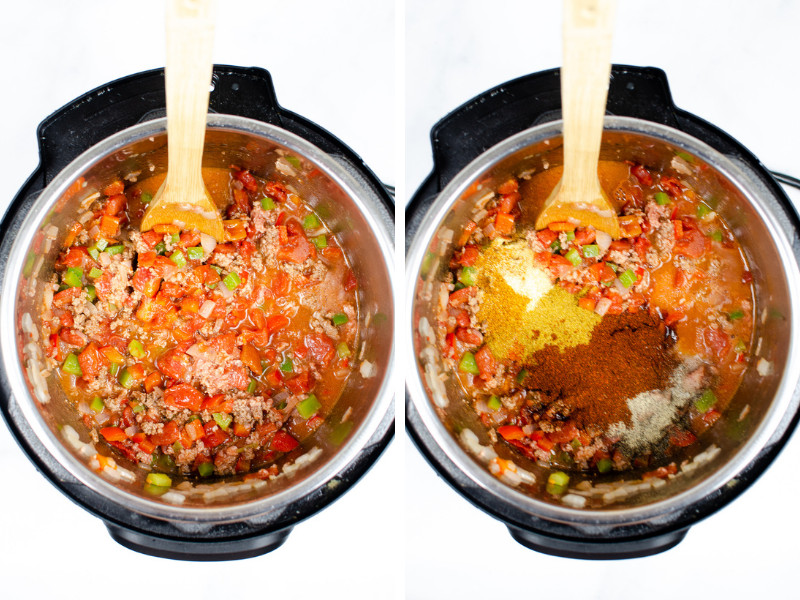
Add your ground meat to the Instant pot. Brown.
Add all of your seasonings except for the Maza Harina. Mix well.
Put the lid on your instant pot by twisting the lid and closing the valve by pushing it away from you. Set It to the pressure for 1 minute (trust me!).
It will take about 10 to 15 minutes to build to pressure. Once it is done cooking, allow it to manually release for 15 minutes.
After the 15 minutes, natural release by using a hot pad or towel to pull the valve toward you. Do not do a quick release before this 15 minutes!
Once all of the pressure has been released, twist open the Instant pot lid and remove.

Add 1 tablespoon of the Maza Harina if desired to thicken your chili. Continue to add 1 tablespoon at a time until desired consistency.
Serve this chili in a bowl as is or topped with sour cream, green onions and shredded cheese.
How to Store Cooked Chili
If you have any chili leftovers you can store them in an air-tight container in your refrigerator. The leftovers should be safe to eat for up to 3 days.
Can I Freeze Prepared Chili?
If you don’t think you’ll eat the leftover chili you can freeze it for 4-6 months in an air-tight container.
Be sure to allow the chili to cool to room temperature.
If hot foods are added to your freezer it can cause other items to partially thaw.
You might also like: Make Ahead Freezer Meals
Savory Instant Pot Recipes
Instant Pot Pulled Pork
Beef Barbacoa Instant Pot Recipe
Instant Pot Pinto Beans Recipe
Instant Pot Beef and Broccoli
Creamy Tomato Soup
Instant Pot Brussels Sprouts
Instant Pot Beef and Barley Soup Recipe
Sweet Instant Pot Recipes
Banana Bread Recipe
Instant Pot Sweet & Salty Popcorn Treat
Instant Pot Strawberry Jam Recipe
Orange Marmalade Recipe

Instant Pot Chili
Ingredients
- 1 lbs Ground Beef or substitute ground turkey, or ground chicken
- 2 tbsp Vegetable Oil
- 1 Red Bell Pepper Diced
- 1 Green Bell Pepper Diced
- 1/2 large White Onion Diced
- 28 oz Canned Diced Tomatoes
- 1 tbsp Salt
- 1/2 tbsp Black Pepper
- 2 tbsp Chili Powder
- 1 tbsp Ground Cumin
- 1 tbsp Paprika
- 1 tbsp Garlic Powder
- 1 tsp Cayenne Pepper
- 1 tbsp Maza Harina
Instructions
-
Set your instant pot to sauté mode. Add 2 tablespoons of vegetable oil.
-
Once your oil is hot, add your bell peppers, and onion. Sauté well to release the flavors until softened. About two minutes
-
Add your ground meatto the Instant pot. Brown.
-
Add all of yourseasonings except for the Maza Harina. Mix well.
-
Put the lid on your Instant Pot by twisting the lid and closing the valve by pushing it away from you. Set It to the pressure for 1 minute.
-
It will take about 1 0to 15 minutes to build to pressure. Once it is done cooking, allow it to manually release for 15 minutes.
-
After the 15 minutes, naturally release by using a hot pad or towel to pull the valve toward you. Do not do a manual release before this 15 minutes.
-
Once all of the pressure has been released, twist open the Instant pot lid and remove. Add 1tablespoon of the Maza Harina if so desired to thicken your chili. Continue to add 1 tablespoon at a time until desired consistency.
-
Serve this chili in a bowl as is or topped with sour cream, green onions and shredded cheese.